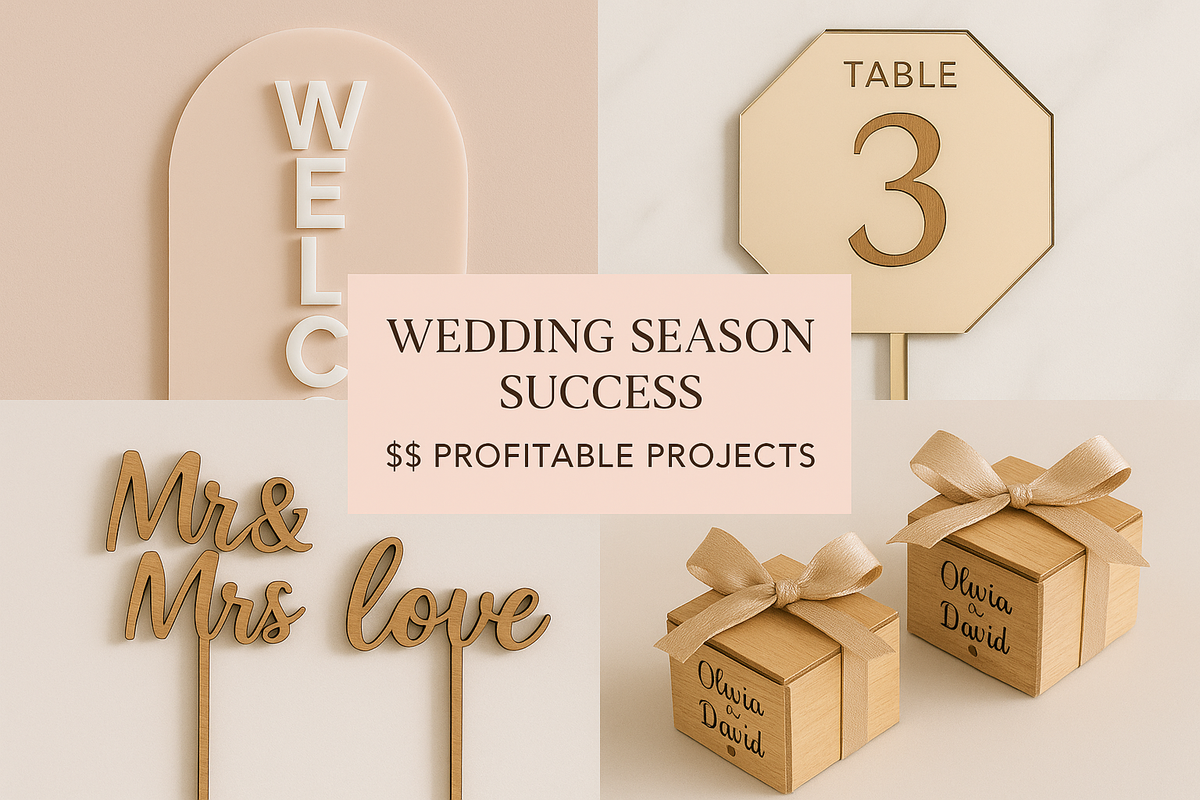
Wedding Season Success: 15 Laser-Engraved Projects Couples Actually Want
~25 min read | Project Ideas
Your Guide to the 2025/2026 Wedding Goldmine
The modern wedding is no longer just a ceremony and a reception; it's a fully curated, branded experience. For laser crafting entrepreneurs, this shift represents a significant business opportunity. Couples are moving away from generic, off-the-shelf decor and are actively seeking hyper-personalized items that tell their unique story and create an immersive atmosphere for their guests.
This demand for bespoke details has turned the wedding industry into a goldmine for makers who can combine creativity with precision.
The Three Key Trends Driving 2025/2026 Wedding Demand
The key to unlocking this market lies in understanding what today's couples actually want. Market analysis and trend forecasting for 2025 and 2026 reveal a fascinating convergence of three macro-trends:
Elevated Minimalism
Forget cluttered and over-the-top. The modern aesthetic favors clean lines, luxurious materials, and simple, structured designs that allow the couple's natural style to shine. This is where laser cutting excels, creating crisp edges on acrylic and elegant engravings on wood.
Nostalgic Romance
From vintage-inspired dress silhouettes like the Basque waist to handwritten vows, couples are looking for elements that feel timeless and deeply personal. Laser engraving can replicate the look of classic calligraphy and etch romantic motifs that feel both old-world and new.
Interactive Keepsakes
Today's weddings are about creating memorable experiences. This extends to items like guest books and favors, which are being reimagined as interactive activities that result in a lasting memento for the couple or their guests.
The intersection of these trends creates a unique market space. The demand isn't for less detail, but for more meaningful detail. An unadorned acrylic sign becomes a high-value item when it features a custom-calligraphed phrase that is unique to the couple, layered in 3D for a modern, architectural feel.
Your laser business, therefore, is not just selling "engraving"; you are offering "storytelling through design," positioning you as a creative partner in the couple's journey.
Unforgettable Signage That Sets the Scene
Wedding signage has evolved from simple information delivery to a cornerstone of the event's visual identity. For laser crafters, this is the category with the highest potential for profit and creative expression.
Project 1: The Minimalist Arch Welcome Sign (Layered Acrylic on Wood)
Why Couples Love It
This design is a powerhouse of trends. It incorporates the popular architectural arch shape, taps into the minimalist desire for clean lines, and uses layered materials to create a stunning 3D texture that photographs beautifully. It feels modern, custom, and incredibly chic.
Materials & Dimensions
- Backing: 1/4" Birch Plywood. Common sizes are 18x24 inches or 24x36 inches
- Lettering & Accent Layer: 1/8" Cast Acrylic in a contrasting color (e.g., white, black, or mirrored gold)
- Adhesive: 3M 300LSE double-sided adhesive sheets
Tutorial Steps
- Design Your File: Create the main arch shape for the plywood backing. Create a second, slightly smaller arch shape from acrylic that will be mounted on top of the wood. Finally, lay out your text and the couple's names using a modern script and clean sans-serif font for a balanced look.
- Prepare for Cutting: Cut the main arch from the 1/4" plywood. For the acrylic pieces, apply the 3M adhesive sheet to the back of your acrylic before cutting.
- Laser Cut: Cut the plywood arch. Then, cut the smaller acrylic arch and the individual letters from the prepared adhesive-backed acrylic.
- Assemble: Carefully peel the protective masking from all pieces. Peel the backing from the adhesive on the smaller acrylic arch and carefully center it on the plywood backer. Then, place each letter onto the sign.
Suggested Laser Settings (Glowforge)
| Operation | Material | Speed | Power | LPI / Passes | Notes |
|---|---|---|---|---|---|
| Cut | 1/4" Birch Plywood | 140 | Full | 2 Passes | May require testing; plywood density varies |
| Cut | 1/8" Cast Acrylic | 150 | Full | 1 Pass | Cut with paper masking on for a clean finish |
| Score (Guide) | 1/4" Birch Plywood | 500 | 10 | 1 Pass | For placement lines; very light power |
Project 2: The Romantic Script "Find Your Seat" Chart
Why Couples Love It
This is a sophisticated and impressive alternative to dozens of individual escort cards. It aligns with the sustainability trend by reducing paper waste and acts as a large, beautiful decor piece that enhances the reception entrance.
Materials & Dimensions
- Material: A single large sheet of 1/4" plywood, typically 24x48 inches to accommodate guest lists
- Finish: Wood stain, clear sealant, and acrylic paint for color-filling
Tutorial Steps
- Layout Design: This is the most critical step. Organize guest names alphabetically by last name, followed by their table number. Use a clear, legible script font for the names and a simple serif or sans-serif for the table numbers. The title, "Find Your Seat," can be in a larger, more decorative font.
- Engrave: Due to the large size, this will be a long engrave. Ensure your material is perfectly flat in the laser bed to maintain focus. Use masking to minimize smoke staining around the engraved areas.
- Finish: Once engraved, remove the piece from the laser but leave the masking on. Use a small brush to paint inside the engraved letters with a contrasting color (like white or gold). This "color-fill" technique makes the text pop and adds a premium touch.
- Seal: After the paint is completely dry, remove the masking tape. Apply a light coat of clear matte or satin sealant to protect the wood and finish the piece.
Suggested Laser Settings (Glowforge)
| Operation | Material | Speed | Power | LPI / Passes | Notes |
|---|---|---|---|---|---|
| Engrave | 1/4" Birch Plywood | 1000 | 80 | 270 LPI | Masking is highly recommended to prevent charring |
| Cut (Outline) | 1/4" Birch Plywood | 140 | Full | 2 Passes | For shaping the board if not a standard rectangle |
Project 3: Mirrored Acrylic Geometric Table Numbers
Why Couples Love It
These table numbers feel incredibly luxe and modern. They combine the ongoing trend for geometric shapes (like hexagons or arches) with the high-end appeal of mirrored acrylic in gold, silver, or rose gold. They catch the light beautifully and elevate the entire tablescape.
Materials & Dimensions
- Material: 1/8" Mirrored Acrylic
- Dimensions: Typically around 5x7 inches for visibility
- Base: A small, clear or matching acrylic stand
Tutorial Steps
- Design: Create your geometric shape (e.g., hexagon). Design the number and the word "Table" in a font that matches the wedding's aesthetic. Design a simple slotted base for the sign to stand in. The slot should be slightly wider than 1/8" to accommodate the material thickness.
- Laser Cutting: Mirrored acrylic is cut with the reflective side facing down. The laser cuts through the gray backing.
- Engraving (Optional): For a different look, you can engrave from the back. This removes the mirrored coating, creating a see-through effect. For this project, we recommend cutting the numbers out of a different material (like white acrylic) and layering them on top for a 3D effect.
- Assembly: Peel the protective film from the front of the mirrored acrylic and the base. Gently slot the table number into its stand. If you created 3D numbers, use a strong clear adhesive like E6000 or acrylic cement to attach them.
Suggested Laser Settings (Glowforge)
| Operation | Material | Speed | Power | LPI / Passes | Notes |
|---|---|---|---|---|---|
| Cut | 1/8" Mirrored Acrylic | 155 | Full | 1 Pass | Place mirror-side DOWN. Leave protective film on the front |
Project 4: "Mr. & Mrs." Floral Hoop Chair Signs
Why Couples Love It
This is a fresh, bohemian take on the classic sweetheart table chair sign. The circular hoop design is modern and provides a perfect frame for florists to add fresh or dried flowers, integrating the signs seamlessly into the overall decor.
Materials & Dimensions
- Text: 1/8" or 1/4" wood (Baltic Birch or Walnut)
- Hoop: A pre-purchased metal or thin wooden hoop, typically 10-14 inches in diameter
- Attachment: Clear fishing line or ribbon
Tutorial Steps
- Sizing: In your design software, create a circle representing your hoop's diameter. Design your text ("Mr.", "Mrs.", "Bride," "Groom") in a sturdy script font. Ensure the letters are thick enough to be structurally sound and scale them to fit attractively within the hoop.
- Welding: Make sure all letters in each word are welded together to form a single, solid piece.
- Cutting: Cut the words from your chosen wood. Masking will help prevent any flashback marks on the back.
- Finishing: Lightly sand the cut words to remove any charring and give them a smooth finish. You can leave them natural, stain them, or paint them to match the wedding colors.
- Assembly: Use clear fishing line to suspend the wooden words in the center of the hoops. Tie securely and trim the excess. Provide the finished signs to the couple or their florist to add the floral arrangements.
Suggested Laser Settings (Glowforge)
| Operation | Material | Speed | Power | LPI / Passes | Notes |
|---|---|---|---|---|---|
| Cut | 1/8" Birch Plywood | 170 | Full | 1 Pass | Use a sturdy script font to avoid fragile connection points |
| Cut | 1/4" Walnut Plywood | 135 | Full | 2 Passes | Slower speed for denser hardwood |
Cake Toppers - The Crowning Glory
A cake topper is a miniature sculpture that captures the essence of the wedding theme. Modern couples are moving beyond simple monograms to toppers that are clever, romantic, and deeply personal.
Project 5: The Elegant "Cat-Eye" Monogram Topper
Why Couples Love It
This design demonstrates that you are ahead of the curve. The "cat-eye" neckline, defined by its sharp, upward-pointing angles, is a forward-looking fashion trend predicted for 2026. Incorporating this subtle, chic detail into a monogram shows a high level of design sophistication and offers brides a unique way to connect their decor to their style.
Materials & Dimensions
- Material: 1/8" Cast Acrylic (Gold Mirror, Black, or White are popular choices)
- Dimensions: Standard width is 6 inches, with a 4-inch non-removable stake
Tutorial Steps
- Design: Start with the couple's monogram. Modify the tips of the letters to have sharp, angular points that mimic the "cat-eye" shape. The key is subtlety.
- Add Stake: Design a single, sturdy stake that is part of the main design. Do not make it a separate piece. This ensures stability in the cake.
- Weld & Outline: Ensure all elements are welded into a single vector shape. Use an outline tool to give the entire piece a uniform thickness and strength.
- Cut: Cut from your chosen acrylic, leaving the protective masking on both sides until it's ready to be used.
Suggested Laser Settings (Glowforge)
| Operation | Material | Speed | Power | LPI / Passes | Notes |
|---|---|---|---|---|---|
| Cut | 1/8" Cast Acrylic | 150 | Full | 1 Pass | Ensure stake is at least 1/4" wide for strength |
Project 6: The "Better Together" Rustic Wood & Engraved Laurel Topper
Why Couples Love It
Perfect for the explosion of rustic, bohemian, and eco-conscious weddings. The natural wood grain combined with a classic engraved laurel or wreath motif feels both organic and timelessly romantic.
Materials & Dimensions
- Material: 1/8" Basswood or Baltic Birch Plywood
- Dimensions: 6-7 inches wide
Tutorial Steps
- Design: Choose a romantic script font for the phrase "Better Together" or the couple's names. Frame the text with a delicate, engraved laurel wreath design.
- Masking is Key: Before engraving, apply masking tape to the entire surface of the wood. This is crucial for preventing smoke and resin from staining the wood grain around the engraved areas, resulting in a crisp, clean look.
- Engrave & Cut: Run the engrave job first, followed by the cut job for the outline and stake.
- Finish: After cutting, gently peel off the masking tape. Use fine-grit sandpaper (220 grit) to lightly sand the surface, which removes any residual haze and gives the topper a professional, smooth finish.
Suggested Laser Settings (Glowforge)
| Operation | Material | Speed | Power | LPI / Passes | Notes |
|---|---|---|---|---|---|
| Engrave | 1/8" Basswood Plywood | 1000 | 60 | 225 LPI | Always use masking tape for clean results on wood |
| Cut | 1/8" Basswood Plywood | 170 | Full | 1 Pass | Cut after engraving is complete |
Project 7: The Modern Calligraphy "Happily Ever After" Acrylic Topper
Why Couples Love It
This is a versatile classic that fits nearly any wedding theme, from modern to traditional. The beauty is in the execution: a flawless cut of a flowing, modern calligraphy script that looks effortless and elegant.
Materials & Dimensions
- Material: 1/8" Acrylic in any color, from classic black to bold hues that match the wedding palette
- Dimensions: 6-8 inches wide
Tutorial Steps
- Font Selection: Choose a calligraphy font where the letters connect naturally. You will need to manually adjust kerning and overlap the letters in your design software.
- Weld the Text: This is the most important step. You must "weld" or "unite" the text into a single, continuous vector shape. If you don't, the laser will cut out each letter individually, and the topper will fall apart.
- Create an Outline: For beginners, the "Create Outline" tool in the Glowforge Premium interface is an excellent way to create a sturdy, single piece from your text. Set the outline to about 1/8 inch to ensure all parts are connected and strong.
- Add Stake & Cut: Add a stake to the bottom of the design and cut the final, single piece from acrylic.
Suggested Laser Settings (Glowforge)
| Operation | Material | Speed | Power | LPI / Passes | Notes |
|---|---|---|---|---|---|
| Cut | 1/8" Cast Acrylic | 150 | Full | 1 Pass | Double-check that all letters are welded before cutting |
Guest Books Reimagined - Creating Lasting Memories
The traditional guest book, often signed and then stored away, is being replaced by interactive alternatives that become permanent fixtures in the couple's home. This trend is not just about novelty; it reflects a fundamental desire for permanence and utility.
Project 8: The "Tree of Life" Drop Box Guest Book
Why Couples Love It
This is one of the most popular and commercially successful guest book alternatives. It's interactive and fun for guests during the reception, and it becomes a beautiful, personalized piece of 3D wall art that the couple can display for years to come.
Materials & Dimensions
- Frame: 1/4" Plywood (e.g., Walnut or Maple) for the front and back frame pieces
- Window: 1/8" Clear Cast Acrylic
- Drop-in Pieces: 1/8" wood (e.g., Birch) for the hearts or leaves guests will sign
- Spacer: 1/4" wood or MDF for the middle layer that creates the depth
Tutorial Steps
- Frame Construction: The drop box is a sandwich of five layers: Back Plywood, Middle Spacer, Drop-in Pieces, Clear Acrylic Window, and Front Plywood Frame.
- Design: Design the front and back frame (e.g., a large tree shape). The middle spacer will be a solid outline of the frame shape with the center removed, creating the "box." Crucially, design a slot at the top of the middle spacer and front frame for guests to drop their signed hearts in.
- Cutting: Cut the front frame, back frame, and middle spacer from 1/4" material. Cut the clear acrylic window to match the outer shape of the front frame. Cut out a large quantity of small wooden hearts or leaves (approx. 1.5-2 inches wide).
- Assembly: Glue the middle spacer to the back plywood frame. Once dry, place the clear acrylic sheet on top. Finally, glue the front plywood frame onto the acrylic. Use wood glue and clamps for a strong bond.
- Finishing Touches: Create a small, engraved sign instructing guests to "Sign a heart and drop it in our frame." Provide fine-tip permanent markers for signing.
Suggested Laser Settings (Glowforge)
| Operation | Material | Speed | Power | LPI / Passes | Notes |
|---|---|---|---|---|---|
| Cut | 1/4" Walnut Plywood | 135 | Full | 2 Passes | Denser wood may require slower speeds or multiple passes |
| Cut | 1/8" Clear Acrylic | 160 | Full | 1 Pass | Leave masking on to prevent scratches during assembly |
| Cut | 1/8" Birch Plywood | 180 | Full | 1 Pass | For cutting dozens of small hearts efficiently |
Project 9: The Personalized Jigsaw Puzzle Guest Book
Why Couples Love It
This idea is perfect for playful couples and is a fun, interactive activity for guests. It becomes a keepsake that the couple can literally piece together on anniversaries, reading the well-wishes from their loved ones.
Materials & Dimensions
- Material: 1/4" Birch Plywood for a sturdy, high-quality feel
- Dimensions: Sizes range from 16x12 inches (approx. 40 pieces) to 24x16 inches (approx. 90 pieces). The pieces should be about 2 inches square to allow room for signatures
Tutorial Steps
- Find a Template: Use a puzzle generator software or purchase an SVG puzzle template. Choose one with large, relatively simple pieces.
- Personalize: In the center of the puzzle, engrave a large monogram, the couple's names, and the wedding date. This central piece will not be signed.
- Engrave & Cut: Engrave the central design first. Then, run the cut job for the puzzle pieces. It's best to use a fresh, clean crumb tray to minimize flashback on the back of the pieces.
- Prepare for Signing: Lightly sand the pieces to ensure they are smooth. Provide a set of high-quality, fine-tip permanent markers for guests to use. Include a small sign that says, "Without you, our puzzle isn't complete. Please sign a piece!"
Suggested Laser Settings (Glowforge)
| Operation | Material | Speed | Power | LPI / Passes | Notes |
|---|---|---|---|---|---|
| Engrave | 1/4" Birch Plywood | 1000 | 75 | 340 LPI | High LPI for a detailed central image |
| Cut | 1/4" Birch Plywood | 140 | Full | 2 Passes | Ensure the laser cuts cleanly through the 1/4" material |
Project 10: The Engraved "Message in a Bottle" Alternative
Why Couples Love It
This concept is whimsical, romantic, and perfect for nautical or beach-themed weddings. Instead of paper scrolls, guests sign small, custom-shaped wooden tokens, creating a more permanent and tactile collection of wishes.
Materials & Dimensions
- Tokens: 1/8" wood (Alder or Cherry work well for engraving) cut into small shapes like hearts, anchors, or seashells (approx. 1.5 inches)
- Container: A large, clear glass bottle or jar (sourced separately)
- Instruction Sign: A small 5x7 inch engraved wood or acrylic sign
Tutorial Steps
- Token Design: Design your token shapes. You can lightly score a small heart or initial on each one for an extra touch.
- Sign Design: Create a small sign with instructions, for example: "Leave your wishes for the new Mr. & Mrs. - A message in a bottle for us to read on our anniversary."
- Mass Production: Cut dozens of tokens. To be efficient, lay out as many as you can on a single sheet of wood in your design software.
- Packaging: Package the tokens in a nice bag or box alongside the instruction sign and fine-tip markers, providing the couple with a complete "guest book kit."
Suggested Laser Settings (Glowforge)
| Operation | Material | Speed | Power | LPI / Passes | Notes |
|---|---|---|---|---|---|
| Cut | 1/8" Alder Wood | 185 | Full | 1 Pass | Alder engraves with high contrast, perfect for small details |
| Engrave (Sign) | 1/8" Alder Wood | 1000 | 85 | 270 LPI | Clear and legible text is key for the instruction sign |
Project 11: The Large Monogram Family Name Sign
Why Couples Love It
This is the epitome of the "guest book as home decor" trend. It's a simple, elegant, and bold statement piece. Guests sign directly onto a large wooden sign featuring the couple's new shared last name or monogram, which can then be hung in their home immediately.
Materials & Dimensions
- Material: 1/4" or even 1/2" plywood for a substantial, high-quality feel
- Dimensions: Large format, typically 24 inches wide or more
Tutorial Steps
- Design: Choose a bold, beautiful font for the last name or a classic monogram design. The focus is on the single, large shape.
- Cutting Thick Plywood: Cutting 1/2" plywood can be challenging and may not be possible on all diode lasers. For CO2 lasers, it requires slow speed and multiple passes. An alternative is to cut two 1/4" pieces and glue them together for a thick, dimensional look.
- Surface Preparation: The key to this project is the finish. After cutting, sand the surface of the wood thoroughly until it is perfectly smooth. Apply a coat of clear matte sealant. This prevents the marker ink from bleeding into the wood grain, ensuring clean signatures.
- Provide Pens: Include a few high-quality paint pens or permanent markers that are tested and confirmed to work well on the sealed surface.
Suggested Laser Settings (Glowforge Pro)
| Operation | Material | Speed | Power | LPI / Passes | Notes |
|---|---|---|---|---|---|
| Cut | 1/4" Plywood | 130 | Full | 2 Passes | Check for complete cut-through; may need a utility knife for small spots |
| Cut | 1/2" Plywood | 115 | Full | 3-4 Passes | This is pushing the limits; extensive testing is required |
Favors & Keepsakes Guests Will Cherish
The modern wedding favor is all about fighting the "throw-away" culture. Couples want to give guests something that is either useful, beautiful, or delicious. Laser-engraved items excel in the first two categories, offering a level of personalization that makes a simple object feel like a treasured gift.
Project 12: Intricate Lace-Cut Cardstock Favor Boxes
Why Couples Love It
These boxes transform a simple favor (like a few chocolates or a small candle) into a work of art. The delicate, laser-cut patterns look incredibly expensive and luxurious, adding a major "wow" factor to the table setting for a relatively low material cost.
Materials & Dimensions
- Material: 65lb or 110lb pearlescent or high-quality cardstock
- Dimensions: A common assembled size is a 2x2x3 inch cube or box
Tutorial Steps
- Find a Box Template: Start with a basic SVG file for a fold-up box. You can find many free or low-cost options online.
- Add the Pattern: In your design software, overlay an intricate pattern (like lace, floral, or geometric) onto the panels of the box template. Ensure the pattern is set to "cut."
- Set Score and Cut Lines: This is crucial. The fold lines of the box must be set to a "score" operation, while the outer perimeter and the decorative pattern are set to "cut." Use different colors for score and cut lines in your file to easily assign different laser settings.
- Laser Settings: Use high speed and very low power for scoring to create a crisp fold line without cutting through. For cutting, the power will be higher but speed should remain fast to prevent burning. Always test on a scrap piece of your exact cardstock first.
Suggested Laser Settings (Glowforge)
| Operation | Material | Speed | Power | LPI / Passes | Notes |
|---|---|---|---|---|---|
| Cut | 110lb Cardstock | 500 | 60 | 1 Pass | High speed is essential to prevent fires |
| Score | 110lb Cardstock | 500 | 5 | 1 Pass | A very light touch is all that's needed for a fold line |
Project 13: Personalized Slate Coaster Favors
Why Couples Love It
This is a top-tier favor because it's genuinely useful. Guests will take these home and use them, keeping the wedding memory alive in their daily lives. Laser engraving on slate creates a permanent, high-contrast white mark that looks incredibly sharp and professional.
Materials & Dimensions
- Material: 4-inch round or square blank slate coasters
- Finish: Small, self-adhesive felt or cork feet for the bottom
Tutorial Steps
- Design: Create a simple design featuring the couple's names or monogram and the wedding date. A clean, bold design engraves best on slate.
- Preparation: Clean the slate coasters with a damp cloth to remove any dust. There is no need for masking.
- Engraving: Place the coaster in the laser. Slate engraving can produce fine dust, so ensure your ventilation is working well. The laser ablates the surface, creating the white mark.
- Finishing: After engraving, wipe the coaster with a damp cloth again to remove any dust from the engraved area. For a professional touch, apply three or four small felt feet to the bottom of each coaster to prevent it from scratching furniture.
Suggested Laser Settings (Glowforge)
| Operation | Material | Speed | Power | LPI / Passes | Notes |
|---|---|---|---|---|---|
| Engrave | Slate Coaster | 600 | 30 | 225 LPI | Power can be varied for different shades; test first |
Project 14: Engraved Wooden Bottle Opener Keychains
Why Couples Love It
This is another highly practical favor that guests will appreciate and use. It's a great fit for rustic, backyard, or brewery-themed weddings and is a sturdy keepsake that will last for years.
Materials & Dimensions
- Material: Pre-made blank wooden bottle openers with keychain hardware
Tutorial Steps
- Create a Jig: The key to efficiency with small, repeatable items is to create a jig. Take a piece of scrap cardboard or Draftboard. Lay out your bottle openers on it and trace their outlines precisely.
- Cut the Jig: In your laser, cut out the traced shapes from the cardboard. This creates perfectly sized pockets to drop your bottle openers into.
- Align the Design: Place your jig in the laser bed. Drop the blank bottle openers into the pockets. Now, in your software, you can place your engraving design (e.g., "Cheers to the happy couple!") perfectly centered over each shape. You can engrave an entire sheet of them at once with perfect alignment.
- Engrave: Run the engraving job. The jig ensures every single piece is identical.
Suggested Laser Settings (Glowforge)
| Operation | Material | Speed | Power | LPI / Passes | Notes |
|---|---|---|---|---|---|
| Engrave | Wood (Varies) | 1000 | 70-90 | 270 LPI | Power will depend on the type of wood on the blank |
| Cut (Jig) | Cardboard | 500 | 70 | 1 Pass | For creating the alignment jig |
Project 15: "Save the Date" Birch Wood Magnets
Why Couples Love It
In a sea of paper mail, a wooden Save the Date magnet stands out. It's a charming, tangible announcement that guests can put on their refrigerator, serving as a constant and delightful reminder of the upcoming celebration.
Materials & Dimensions
- Material: 1/8" Baltic Birch Plywood
- Hardware: Small, strong neodymium magnets and a strong adhesive like E6000 or super glue
Tutorial Steps
- Design: Design a shape for the magnet (e.g., a circle, heart, or a shape relevant to the wedding location like a mountain). Include the key information: "Save the Date," the couple's names, the date, and the city.
- Engrave & Cut: Mask the wood to ensure a clean engrave. Run the engrave job first, then the cut job. Lay out as many as possible on one sheet to be efficient.
- Assembly: After cutting, remove the masking. Apply a small dab of strong adhesive to the back of each wooden piece and carefully place a magnet on top. Be mindful of magnet polarity if you're stacking them.
- Mailing: Advise your clients that wooden magnets may require extra postage or a padded envelope to be mailed safely.
Suggested Laser Settings (Glowforge)
| Operation | Material | Speed | Power | LPI / Passes | Notes |
|---|---|---|---|---|---|
| Engrave | 1/8" Birch Plywood | 1000 | 75 | 340 LPI | Use masking for a high-contrast, clean result |
| Cut | 1/8" Birch Plywood | 180 | Full | 1 Pass | Ensure small details in the cut are not too fragile |
Your Blueprint for a Profitable Wedding Season
Success in the modern wedding market is achieved by understanding the deeper motivations behind the trends. It's not just about minimalism; it's about meaningful, uncluttered elegance. It's not just about novelty guest books; it's about creating interactive heirlooms. It's not just about favors; it's about giving sustainable, useful gifts that guests will cherish.
By offering high-value, personalized products that tap into these core desires, you position your laser craft business as an indispensable partner for couples planning their perfect day.
We've provided the "what" and the "how" for 15 trend-aligned projects that can form the foundation of a thriving wedding-focused business. However, the biggest hurdle for any busy entrepreneur is often the "when." Designing 15 unique product lines from scratch, ensuring each file is perfectly optimized for laser cutting, takes hundreds of hours—time that could be spent making, marketing, and selling.
To fast-track your success and start capitalizing on the wedding season now, you need a library of professionally designed, laser-ready files.
Ready to Dominate Wedding Season?
Get professionally designed, laser-ready wedding files and start capitalizing on the 2025/2026 wedding boom. Stop designing and start making money.
Browse Wedding DesignsProfessional designs • Commercial licensing • Instant download